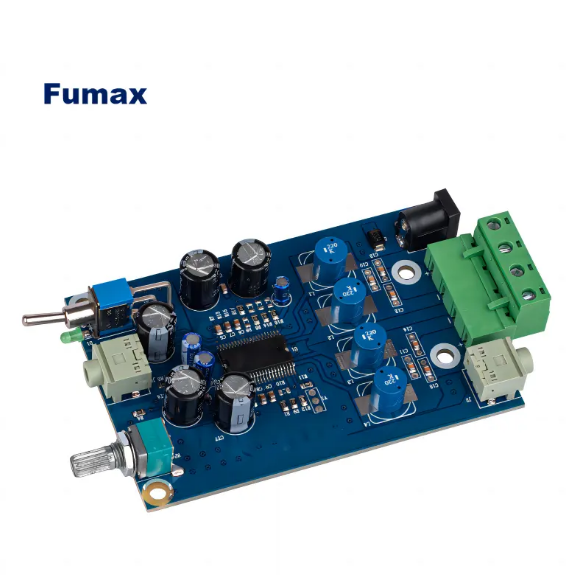
Street light circuit board PCB assembly process: selection, layout, welding, inspection, debugging, then install the assembled circuit board into the street light housing, connect the power supply and control circuits, and complete the assembly of the entire street light.
The assembly process of street light circuit board PCB includes the following steps:
Selection: According to the functional requirements of the street light circuit board, select appropriate components, including chips, capacitors, resistors, digital tubes, LEDs, etc.
Layout: Place the components on the circuit board according to the design requirements, and ensure that the electrical connections between them meet the design requirements.
Welding: Welding components to the circuit board. This step usually requires the use of welding tools such as hot air guns, soldering stations, etc. The temperature and time must be controlled during welding to avoid damaging components or circuit boards.
Inspection: After assembly is completed, the circuit board needs to be inspected to ensure that all components have been installed correctly and that the circuit board is functioning properly. This step can be tested using tools such as multimeters and oscilloscopes.
Debugging: If a problem is found in the test, debugging is required to fix the problem or adjust circuit parameters.
Assembly: Install the circuit board into the street light housing, connect the power supply and control circuits, and complete the assembly of the entire street light.
It should be noted that the assembly process of street light circuit board PCB may vary due to different design requirements and manufacturers.
At the same time, you need to pay attention to safety issues during the assembly process to avoid accidents such as electric shock and fire.
Details and considerations
Cleaning: Before welding, make sure the surface of the circuit board and components is clean and free of dust and impurities to avoid affecting the welding effect.
Orientation: Make sure the orientation of components is correct, especially direction-sensitive components such as diodes, electrolytic capacitors, etc.
Moisture-proof: Before assembly, the circuit board should be stored in a dry environment to avoid moisture.
Fixing: For some components that need to be fixed, such as digital tubes, LEDs, etc., appropriate fixing methods, such as screws, clips, etc., should be used to ensure that they are firm and reliable.
Heat dissipation: For some components that require heat dissipation, such as power tubes, large capacitors, etc., you should consider installing heat sinks or fans to ensure that they can effectively dissipate heat when working.
Protection: After assembly is completed, equipment such as a protective cover or dust cover can be used to protect the circuit board from damage and contamination from the external environment.
Label: In order to facilitate future maintenance and repair, labels or marks can be affixed to the circuit board to indicate the name, specifications, parameters and other information of the components.
In short, the assembly process of street lamp circuit board PCB needs to strictly abide by safety operating procedures and operate in accordance with reasonable process requirements to ensure that the assembled circuit board can work safely and reliably.
At the same time, it is also necessary to continuously summarize experience and improve assembly efficiency and product quality.
Why HDI and how does it work In the realm of industrial control systems, High-Density Interconnect (HDI) Printed Circuit Boards (PCBs) have emerged as transformative components, revolutionizing the landscape of modern manufacturing and automation. HDI PCBs play a pivotal role in enhancing the functionality, reliability, and compactness of various industrial devices, facilitating an era of […]
The IPC (Association Connecting Electronics Industries) is a global trade association that develops standards for the electronics manufacturing industry. These standards are crucial for ensuring quality, reliability, and consistency in the production of printed circuit boards (PCBs) and their assembly. This article will cover the main IPC standards relevant to PCB manufacturing and assembly, detail […]
Why Rosin and Flux Help with Soldering Rosin and flux make soldering easier for a few key reasons: How They Work Rosin: When heated, it decomposes into active components that remove oxides and form a protective gas to prevent further oxidation. Flux: Contains various active ingredients that become active at high temperatures, cleaning oxides, improving […]
Designing PCBs for Internet of Things (IoT) products, especially those incorporating Ultra-Wideband (UWB) modules, involves a unique set of challenges and considerations. These include ensuring optimal electrical performance, thermal management, mechanical strength, manufacturability, environmental compliance, and cost-effectiveness. This article delves into the specific factors engineers need to consider when designing PCBs for IoT products with […]
What are Motors and Their Types? Motors are essential devices that convert electrical energy into mechanical energy, powering countless applications from household appliances to industrial machinery. Understanding the different types of motors is crucial for selecting the right one for your needs. Here are the main types of motors: Designing and Producing Motor Control PCBs […]
Multi-layer PCBs (Printed Circuit Boards) are widely used in modern electronic devices due to their capability to provide more routing layers, higher electrical performance, and reduced size. However, assembling multi-layer PCBs involves several critical steps and meticulous attention to detail to ensure the final product’s quality and reliability. Below are the detailed considerations to keep […]
In the electronics manufacturing industry, ensuring the quality and functionality of Printed Circuit Board Assemblies (PCBAs) is crucial. One of the key tools used in this process is the PCBA testing jig. This article will provide an in-depth overview of what a PCBA testing jig is, its basic structure, how it is manufactured, and how […]
Hey there, tech enthusiasts! Get ready to dive deep into the fascinating world of circuit card assembly. In this comprehensive guide, we’ll take you through every meticulous step of the process, from PCB manufacturing to the final assembly of the board. So grab your coffee, settle in, and let’s explore the intricate journey of bringing […]
Editor’s Note: In modern high-speed designs, analyzing signal integrity, power integrity, and EMC separately is not enough; a holistic approach is essential for successful design. Background Issue: When signals cross over segmentation areas between adjacent reference planes on a layer, discussions about signal integrity often arise. Some argue that signals should not cross the segmentation […]